1.RADIUS Authentication for Cisco Router Logins
RADIUS or Remote Authentication Dial In User Service is a protocol that allows us to centralize the authentication and authorization of systems to connect to network resources. In this example I will configure a Cisco router to use RADIUS to authenticate users for logins to the Cisco command console. This will ease the administrative burden from needing to set up multiple local user databases on each of our routers.
First let’s make sure that the new AAA command set is active:
R1# conf t
R1(config)# aaa new-model
If you don’t already have a user configured in the local user database on the router it is a good idea to create one. This is important so that you can access you router remotely in the event the RADIUS server becomes unavailable to the router. We also need to make sure that we have an enable password set for privileged EXEC mode. I will use the secret modifier on both so that the passwords are encrypted with the stronger type 5 MD5 hash table:
R1(config)# username john secret JohnsPassword
R1(config)# enable secret EnablePassword
Now we’ll specify the IP address of the system that will be our RADIUS server. We can include an encryption key unique to each RADIUS server or we can specify a key globally. I’ll use a global key. Also optionally we can specify the ports used for RADIUS authentication and accounting, these default to 1645 and 1646 but I’ll specify them in the command anyway.
R1(config)# radius-server host 192.168.2.5 auth-port 1645 acct-port 1646
R1(config)# radius-server key MyRadiusKey
To encrypt the RADIUS key we’ve entered enable the password encryption service. This enables relatively insecure type 7 encryption on the key, but it’s better than leaving it there in plain text!
R1(config)# service password-encryptionWe’ll activate authentication for logins to the router and specify that RADIUS is the preferred method but we’ll include the local user database as a fall back if RADIUS becomes unavailable. Note that users in the local database cannot be used if the user doesn’t exist in RADIUS, it will only fall back if the RADIUS server is offline.
R1(config)# aaa authentication login default group radius localThis command is optional but will automatically take RADIUS authenticated users to privileged Exec (15) mode without requiring them to type “enable”.
R1(config)# aaa authorization exec default group radius if-authenticatedSpecify the interface with the source address supplied in RADIUS traffic. In my case I have a router with a VLAN interface configured, otherwise you can use a physical interface.
R1(config)# ip radius source-interface Vlan 10Now it is time to set up our RADIUS server to allow the Cisco router to use it’s authentication services. In my example I will make use of a Windows RADIUS server in an Active Directory domain. Below you can find an article on configuring RADIUS services on a Windows Server 2003 domain controller.
Set Up Windows 2003 IAS Server with RADIUS Authentication for Cisco Router Logins
Once you’ve completed the set up of your RADIUS server attempt to login to your Cisco router via telnet/SSH with a Windows user account. It’s also a good idea to test the fall back option using the local user database by disconnecting the RADIUS server from the router and attempting to login with that user. Hopefully all your login attempts will run smoothly and success will be at hand!
References
http://www.blindhog.net/cisco-aaa-login-authentication-with-radius-ms-ias/
2.Set Up Windows 2003 IAS Server with RADIUS Authentication for Cisco Router Logins
As a companion to my article RADIUS Authentication for Cisco Router Logins, this post will discuss the configuration of a Windows 2003 R2 server for Cisco router logins using RADIUS authentication. In my example I will install the Internet Authentication Service to support RADIUS on a Windows 2003 R2 domain controller and give router login access to an Active Directory domain user.
Configure User(s) for RADIUS Authentication on Windows Server 2003 R2
First Go into Start > Admin Tools > Active Directory Users and Computers. Optionally you can create a new group and add users to it that you want to grant router login access. In this example I will grant access to the existing Domain Admins user group.

Now double click a user account that you want to provide router login capability. I will use the Administrator account.

In the user properties dialog click the Dial-in tab, then make sure that Remote Access Permission is set to “Allow access”. You can also set this to “Control access through Remote Access Policy”, this should work with the policy settings we’ll specify later. Click OK.
Install Windows 2003 IAS/RADIUS Service
Go to Start > Control Panel > Add or Remove Programs.

On the left click Add/Remove Windows Components.
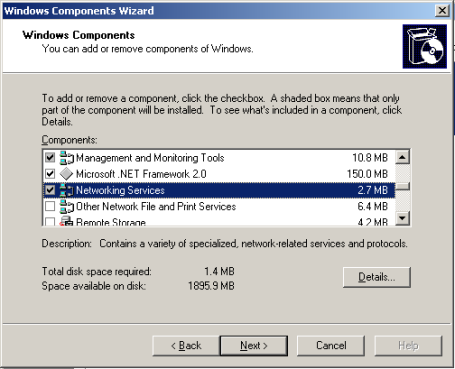
Scroll down and highlight Networking Services, then click Details.

Place a check mark next to Internet Authentication Service, then click OK.
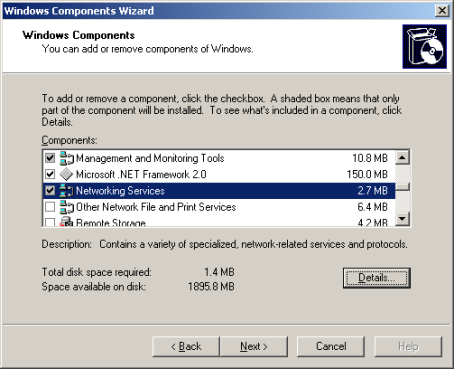
Click Next. Click Finish at the install confirmation window.
Configure Windows 2003 IAS/RADIUS Service for Cisco Router Logins
Now let’s configure the policies to allow our Cisco router to make authentications against this IAS/RADIUS server. Go to Start > Admin Tools > Internet Authentication Service.

In the left pane tree right click Remote Access Policies and choose New Remote Access Policy from the menu.

Select “Set up a custom policy” and type a name for your Cisco router policy. Click Next.
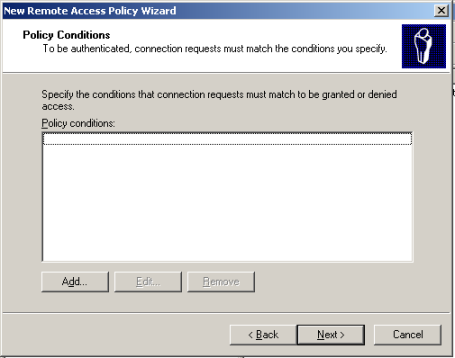
Click Add in the Policy Conditions.

Highlight the Windows Groups attribute type and click Add.
3.Install Windows 2008 R2 NPS for RADIUS Authentication for Cisco Router Logins
A while back I documented a procedure to allow RADIUS Authentication for Cisco Router Logins. Shortly thereafter I included additional instructions on how to Set Up Windows 2003 IAS Server with RADIUS Authentication for Cisco Router Logins. This updated post will discuss the configuration of a Windows 2008 R2 server for Cisco router logins using RADIUS authentication. In my example I will install the Network Policy Server to support RADIUS on a Windows 2008 R2 domain controller and give router login access to an Active Directory domain user.
First go into Server Manager.
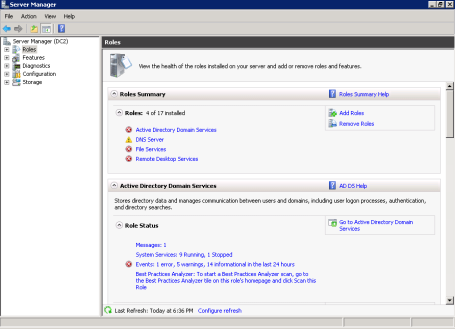
Highlight Roles on the left side, then in the Role Summary section click Add Roles on the far right.

When you reach the Select Server Roles screen, check Network Policy and Access Services. Click Next.

Check Network Policy Server only, then click Next. Then click Install and and confirm the install was successful.
Now go to Start > Admin Tools > Network Policy Server.

In the left pane open up Policies, then right click Network Policies and select New from the menu.
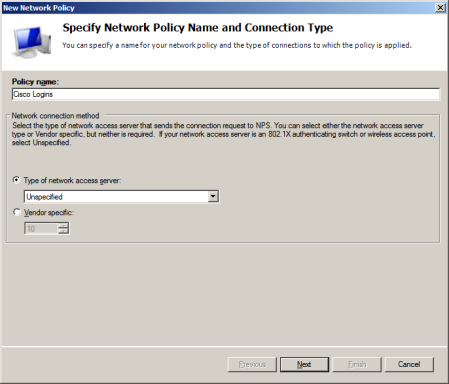
Type a name for the new login policy, leave the network access server type at Unspecified and click Next.

Click Add to add the conditions necessary for this network policy to be run.

We will specify that this policy is run for users in a specific Windows group, so highlight Windows Group and click Add.

Click Add Groups.

Type the name of the user group that you want to grant Cisco login access to. I will give this access to my Domain Admins. Click Check Names to verify, then click OK.

Click OK.


0 comments:
Post a Comment